Wednesday, June 29, 2011

Buffalo Mac and Cheese

Buffalo Mac and Cheese: what a glorious treat!  To celebrate our engagement with our families, we had everyone over last Friday.  Being me, I stressed over what the menu would include for about a week.  We decided that we were going to get a sandwich tray from Wegman's, but we needed some sides and apps.  This is one of the sides I decided on.  I have seen this concept going around a lot of the blogs I read and I saw it on the menu of a restaurant and decided that I had to try it!  I went with my mom's recipe for mac and cheese and just added some chicken and hot sauce!  It was delish!  I also made a vegetarian option for my brother and sister-in-law, and in all honesty, it was just as good as the one with the chicken!

What you need:
  • 4 tbs butter
  • 4 tbs flour
  • 4 c milk
  • 2/3 c hot sauce (I like Franks)
  • 4 c cheddar cheese
  • 1 lbs pasta (I like elbow) cooked al dente
  • 1 lbs cooked chicken (cubed) (optional)
  • blue cheese crumbles (optional)

Start by melting the butter in a pot.


When the butter is completely melted, add in the flour and whisk to combine.


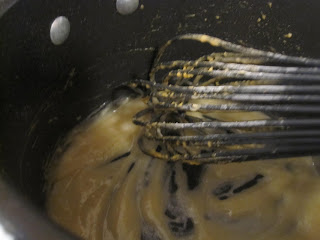
Whisk constantly and let the mixture brown to a caramel color.  This is really important so you don't have a flour taste.  You have successfully made your roux!


Slowly add in the milk and whisk to combine.  You don't want to add the milk too quickly or you'll get a clumpy mess.


Let the mixture cook over medium heat until it thickens.  It will take 5-10 minutes.


Add in your hot sauce.  If you don't like things spicy, cut back on the hot sauce.  If you like things really hot, add more!

Whisk to combine.  You get the most beautiful color!


Add in two cups of cheese and whisk until it is completely melted and combined.


  If you are using chicken, combine your cooked chicken with your cooked pasta.  It is very important to cook your pasta to al dente because you are going to be cooking it longer when it goes into the oven and you do not want your pasta to turn into a mussy, baby food-esque, mess!


Once everything is nicely blended, dump the cheese sauce over your cooked pasta.  Stir to combine.


Then pour everything into a 9x13 casserole dish that has been sprayed with non-stick spray.


Top with the remaining cheese and bake in a preheated 350 degree oven for 30 minutes or until the cheese on top is melted and browned.


The finished product is a yummy, cheesy, spicy piece of heaven! 


I used two different types of pasta, elbow for the veggie one and campanelle for the chicken.  I personally liked the elbow A LOT better!  I think shells would work well too.
ALSO, I wanted to put blue cheese crumbles on top too, but certain family members are not a fan, but if you do like blue cheese that is a really good option!

I hope you like this as much as we did!

Enjoy!


Tuesday, June 21, 2011

Our Engagement Story!

It was just a typical Thursday and I went to work as usual.  The only thing exciting I had planned for the day was to meet up with Stephanie (Mike's little sister) because I wanted to pay to get her nails done for prom (which was on Friday).

We got our nails done and I left to go home, but I took my time, stopped and got gas, jammed to some lady ga ga...nothing too terribly exciting...

When I arrived home, there was a note on the door that said "Agent Lalonde" on the front!  I verbally said "what the hell?".  I hope the little kid across the hall didn't hear me...


I took the note off of the door and began to read my "Mission."  It told me that I had to complete a very important series of tasks!  My first task was to get ready in 40 minutes and after which I could move on to Step 2, which was located on the dining room table!

I got ready pretty quick!  Pretty much because I really wanted to find out what my next task was!

I went to the table and it was covered in tinfoil and in big letters it said "Task 2".  I peeled the tinfoil off and it revealed six roses and two pieces of paper.  The first paper was addressed from the six flowers on the table.  It explained that they used to be a dozen, but they were ambushed!  Their attacker took six of their friends and hid them around our apartment with clues of where their captor was hiding.  

 
The second paper gave the hints to where the flowers were hidden.  It had cute little riddles like "The temperature in here gets pretty hot, it still smells like cookies, in case you forgot" and "This is a place where you store all your jackets, I'm surprised the pole hasn't fallen from its brackets".  It was so exciting!  I started running around the apartment gathering clues!  When I found all six roses and clues, I had to fit them onto the puzzle board that was drawn out for me.


I rushed around the apartment finding the roses and unfortunately, I worked up a sweat.  I found all 6 roses and picture bits and put the puzzle together.


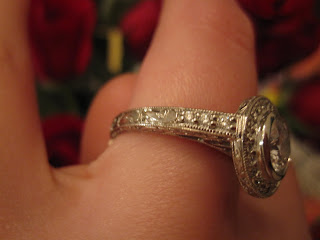
The picture was of a picnic table in the park that we walk by all the time.  I figured it out!  I knew where he was!  I sent the perpetrator a text to tell him I knew were he was and that I was coming to get him!  I set off for the park and when I got there, I saw my handsome boyfriend standing there with another dozen roses.  When I got to him, he began to tell me how much I meant to him and then he got down on one knee.  I instantly started the waterworks and when he pulled out the ring and opened the box, I couldn't even see it!  He asked, "will you marry me" and I said the traditional "of course!".  Then I wiped my eyes and saw the most beautiful ring EVER!


I finally pulled my emotions together!  Well, so I thought, I whimpered all the way home!  I was just so happy I couldn't keep it in!

Then we went out to dinner at Matador in Wayne and called and texted all of our loved ones!  At dinner, it looked like we hated each other because we were trying to keep up with all the love we were getting from our friends and family.  It was a great dinner and an AMAZING night!

I couldn't be happier to be engaged to such an incredible man.  He is sweet, loving, and always knows how to make me laugh.  I am so lucky that the goofy guy in all the pictures you have seen, has decided to marry me.  He is my best friend and I am truly blessed that I get to spend the rest of my life with him!


Brag pictures of my ring!


And of my handsome man!


Tuesday, June 14, 2011

Garlic and Shrimp Pasta Salad

This is very simple, very basic, but absolutely divine recipe.  My Uncle Dave made this for me a couple summers back and I have been hooked ever since!  There are very few ingredients, but it is a good thing because all the flavors aren't fighting against one another.  Each ingredient really gets to shine! 

What You Need:
  • 1 lbs pasta (I like bow ties, but whatever pasta you like in your pasta salad is fine)
  • 1 lbs shrimp
  • 3 cloves of garlic
  • 1/3 c olive oil
  • 1-2 tbs lemon juice
  • salt and pepper
Start by boiling a large pot of salted water for the pasta.  Cook the pasta according to the package till al dente.  Make sure to try your pasta before draining it!  I did not and it was undercooked so I had to bring another pot of water up to a boil...big foul!


When the pasta is done, immediately shock it with cold water!  This will stop the cooking process and taking all the starchiness (real word or not?) out of the pasta.  Then you can set it aside in a large bowl while you prepare everything else.


Take the leafy part of the parsley off of the stems.  You want about 1/4-1//2 cup.


Mince.  The best way to do this is to roll your herbs to look like a cigar and start and one end and chop.  Fighting with one leaf at time is no beuno


If you are using frozen shrimp (like I did) you can either defrost it by letting it sit in the fridge over night or by running COLD water over them.  It takes about 10 minutes to defrost if you are doing the cold water method.


If you are using large shrimp cut in half or into thirds depending on how large the shrimp is. 


You can do the garlic two ways.  You can either dice it very finely or do what I did... 


I put the garlic into my magic bullet with the olive oil and pureed it until all the garlic is incorporated into the oil. 


Beware of large chucks that might have managed to escape the blade!  If someone bites into a huge chuck of garlic, they might disown you as a friend!


Combine the pasta and the shrimp.  Make sure the pasta is completely drained before adding anything!


Add in the garlic and olive oil.


Salt and pepper generously.


Add in the parsley...


and the lemon...


and give a good stir to combine all of the ingredients.


Let chill in the fridge to let the flavors mingle and then you will be ready to eat!  Do give it a taste test before you serve it.  I had trouble getting enough salt in there, but remember you can always add more, but you can't take it back out after it is in!


Enjoy!


Wednesday, June 8, 2011

Yummy Cheesy Garlic-y Salmon

This is the absolute easiest fish recipe EVER!  It does require you to go to our favorite grocery store WEGMANS!  If you live near one and you like salmon, try this!  I have to credit this one to Mike's step-mom Jeanne, she made this for us awhile ago and it was delicious! 

What you need:
  • salmon fillets
  • Wegmans' garlic and herb cheese spread
  • salt and pepper


  Salt and pepper both sides of the salmon.  Place the salmon on a tinfoil lined cookie sheet that has been sprayed with Pam.


Spread a thick layer of the cheese spread onto the salmon.


Place into a preheated 400 degree oven for 10-12 minutes.  For thicker salmon leave in for a little bit longer.


Look how nice and melty the cheese spread gets!  I am drooling looking at it!


I just served it with a side of oven roasted asparagus that had some garlic in it to compliment the garlic in the cheese spread.


The flavors are amazing together!  This was probably my favorite fish dish to date and by far the easiest.


Enjoy!